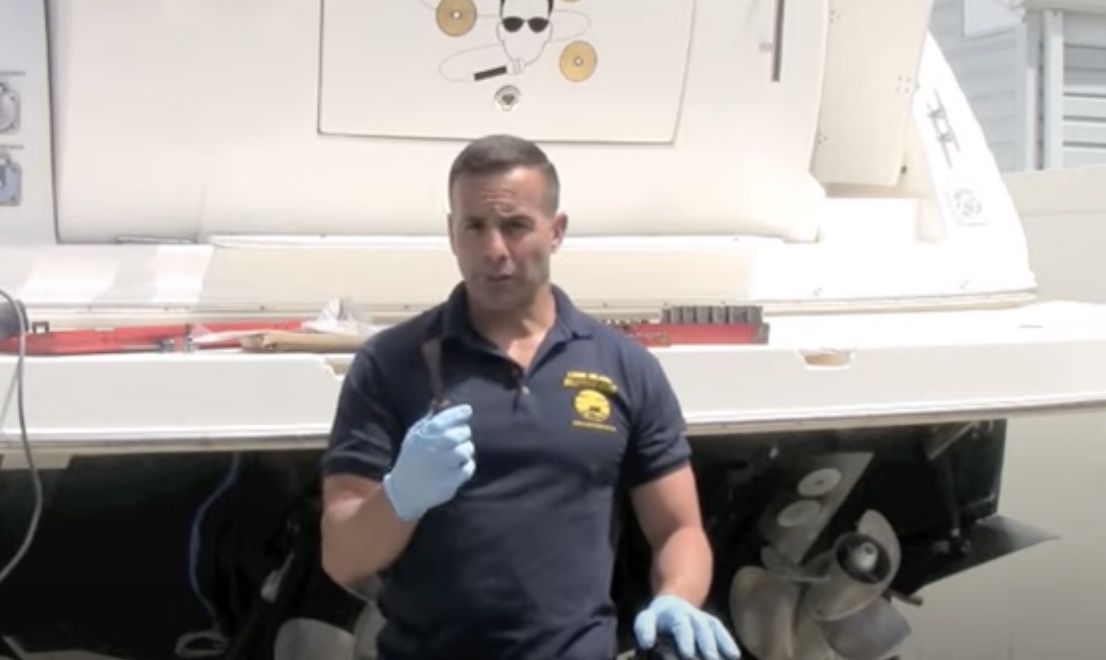
How To: Replace Zinc Anodes
Replacing the zinc nodes is the things you have to do around springtime for the boat to be in proper shape to go into the water.
Changing the zincs is pretty easy once you do it once, then you realize how simple it is.
Now, remember I have a Rinker but this is a process done on every boat.
I will start with the Mercruiser engine parts, they come with all the things you need like the bolts, so they are not going to fall off while using it.
As you can see comparing the once I used last year from the new ones how much it wears on it, that is the ones I am taking off and the new ones we will using.
In my boat I have Bravo III motor, I have twins, there is a couple of tools you need, Simple tools like sockets, they are all 1/4 inch mm, easier to get into spots.
The first one I want to show you is how to change the back one because it is the most difficult one to change and to reach, you have to trim the motor up to get in and change it.
You can see the bolt and the zinc and the socket will fit right over there, lose them up and get them off, it takes a little time you can try to loosen it with your hand if you can reach it you just have to reach in and get it.
The last bolt. Shake it down if it has a little bit of debris and take it off with my hand.
It is all going to be power washed at the end when I am done changing the Zinc
Get the new zinc and start installing it make sure nothing is under it, hand tight.
You can get vibration from the motor thought the year that would loosen the knot; that’s why you use the lock washers.
The next one is the front so it is really easy the next is 13 mm, there is a hexagon to cover bolt and turn it. Hold the blade and tighten it up
The next two are on the top, I’ll go inside and kick the drive down so it is easier to get to, it is and 8mm loosen them up and screw it without messing it up.
If you don’t feel comfortable you don’t feel it is tight enough you can grab a shorter extension nice and sturdy.
Go to the other side and repeat the same process of losing in them up again.
The last things to be changed now, are the two bottom ones, the back one is located under the plunger it is very difficult, the hardest part is to be getting the bolt. It is hard because you can’t see it.
The reason why, if it falls off you are going to hit the prop.
I am using 13 mm again long extension 1/4 inc is fine if you have problems you need a larger socket rancher
I have a grabber tool and we are going to try to grab the bolt, you can see the new one has it has glue on it it. Then we put the bolt back in there.
There is two for the bottom you can see this one doesn’t have a thread t to it that is the front one because the bolt is on the bottom over here, and you can see the back one you can see have much it wore out.
It is protecting your prop and you can see the screw pattern on that one, there are two indents so it going to slide there so it doesn’t fall, get the indent to get that right there.
Put the cap back on so no water gets in there, there is a little vent in there so and the water will get out of there.
The last one 13 mm with no extension right on the bottom. Righty tighty lefty losey! there is no lock washer on this one you can see how much it wore protecting the engine put this in there like that.
Tighten that up and you are done!
Share this article

Written by : Dennise Marone
Follow us
denissemarone@gmail.com
eddieue@gmail.com
Latest articles
June 17, 2025
June 17, 2025
June 17, 2025
June 17, 2025